Adigo Microsoft Outlook Addin helpful tips and tools
Download version 1.0.0.0 of the Adigo Outlook addin.
You may also need to install the Visual Studio 2010 Tools for Office Runtime, found here.
Check back here or in our newsletter for the latest release for updates to the Adigo Outlook plugin.
Downloading and installing the plugin:
Q: How do I download the plugin?
A: You will receive the Outlook plugin link in your welcome e-mail from Adigo or in the link above. Simply click on the link and run through steps to download the plugin.
note: You may need to also install Microsoft Visual Studio 2010 Tools for Office Runtime.
Q: How can I tell if the plug in has installed correctly?
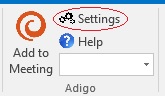
A: Go to your calendar section of Outlook, select new meeting. In the meeting invite you will see a button with the Adigo logo which looks like:
Initial setup of account settings:
Q: How do I get my conference information onto the e-mail invite?
A: There is a one-time set up that is needed to add your conference account dial information to the plugin.
Step 1: Have your Adigo Conference access information readily available
• You will need a toll or toll free access number
• Conference ID if utilized
• If you have international calling, have your web address
• If you have a web product you want included into your email invite
Step 2: Open up outlook calendar, select new meeting request, and go to the setting link on the Adigo outlook plug in.
Step 3: A pop up box will open for you to input your Adigo Conferencing details.
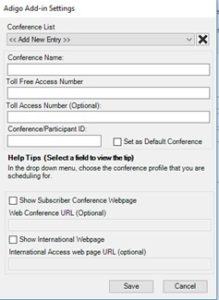
Step 4: Enter Conference name.
• This is for your purposes only to know which email invite to use when sending out the conference detail invite.
• You can have as many as 5 different profiles set up. Most users will only have one main set of conferencing information, but for those that require the ability to book more than one conference invite this functionality is included.
note: An example of someone using more than one set of conferencing information would be an executive assistant to two individuals who both require scheduling of their conference calls. The executive assistant would set up two different sets of conference information and label each accordingly so they would know which invite to use respectively.
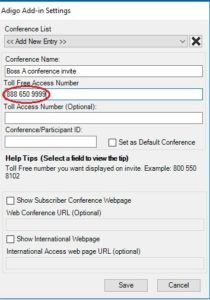
Step 5: Enter your Conference Toll Free Access number. This is the number that participants will utilize to dial into your conference call.
Step 6: Enter your Toll Access number if you wish to have this included in your invite. This is optional especially if you do not have any international callers you may choose to leave the toll number off of the profile. You can always go back and edit any profile you have set up (You can add, delete or change information after you set up the original profile.)
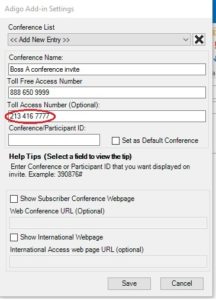
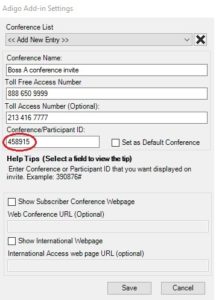
Step 7: Enter your Conference/Participant ID that will need to be entered by your callers. Note if you have a VIP account, you can leave this blank or state none in the field provided.
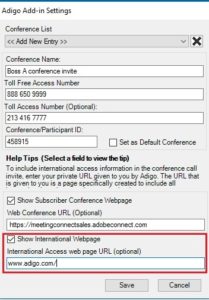
Step 8: Show conference Webpage check box in the settings set up box. This is where you can enter any web product link (Adobe, IBM, etc) if you want to include it on your invites. If this option is selected, it will be on every invite. You might not use your web product each conference call, so you could set up 2 different profiles in the conference list. One with the Web link and one without.

Step 9: Show international Webpage check box in the settings set up box. This section is where you would input your special webpage Adigo has set up for you for International access numbers you have authorized on your account. As with the Web Conference URL, this is optional and you may not want on every invite. In that event you could have two profiles set up, one with and one without the International Access web page URL.
Step 10: Select Save. You have now set up your conferencing profile and can now utilize your profile to send out the appropriate invite.
Q: Once I set up my profile, how do I send out invite?
A: Step 1: Go to calendar section of Outlook
Step 2: Select new appointment
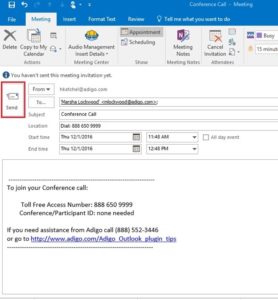
Step 3: Click Add to Meeting (This will automatically fill in your email invite with the information on your default profile.)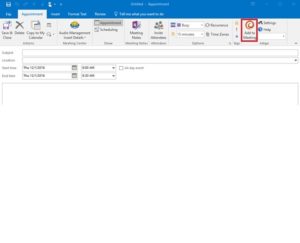
Step 4: Select invite attendees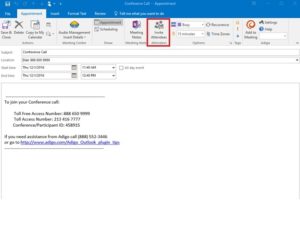
Step 5: Add email addresses you want to send the invite to
Step 6: Select send.
Q: If I have more than one profile set up, how do I select the correct one to send?
A:Step 1: Go to calendar section of your outlook
Step 2: Select new appointment
Step 3: In drop down menu in the Adigo Outlook plug in section, select correct conference profile.
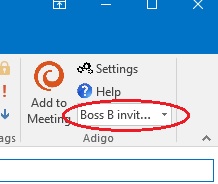
Step 4: After selecting the profile you want in the drop down menu, click on add meeting.
Step 5: Select invite attendees
Step 6: Once you have selected all the emails you want to include, select send.